


As gardeners, we love both the process and the reward. It feels good to get your hands dirty, nurture your thriving plants, and, at the right time, enjoy a bountiful crop. It's the love for all of it that pushes us to make changes in our garden from year to year.
We continuously strive to improve and get the most out of it. Whether it's choosing to try different vegetable types, adding new soil amendments, rotating where things are planted, or deciding, "Maybe, I should try growing my garden up instead of out."
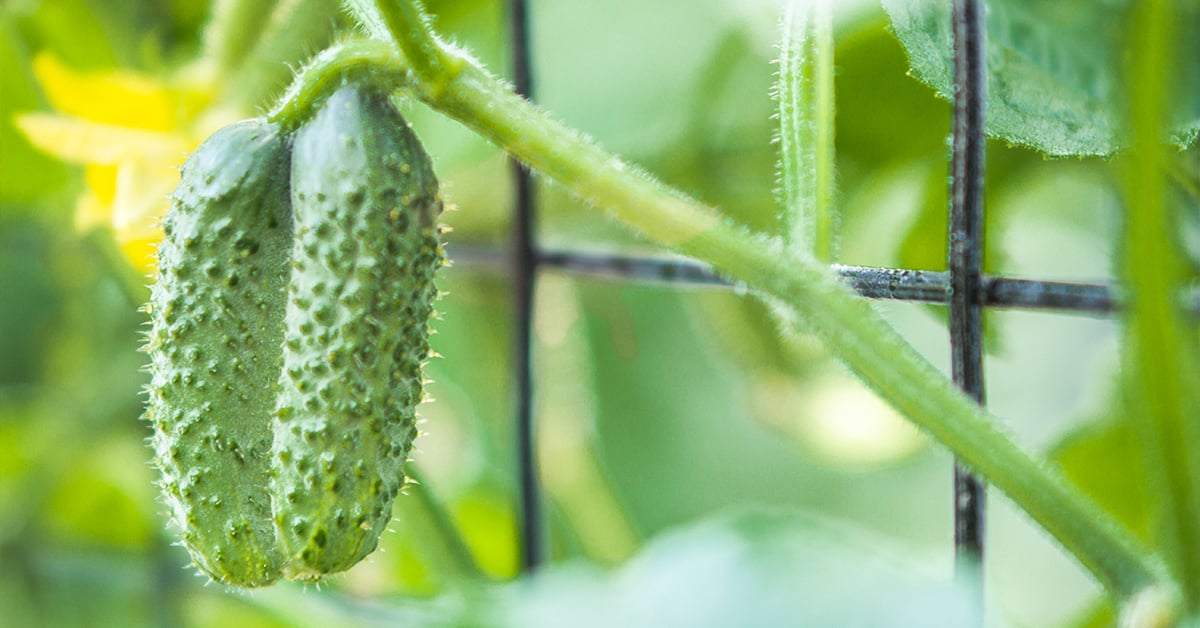
Perhaps you didn't think it was possible to grow cucumbers or cantaloupe in your yard. They can, after all, stretch over a wide space. But, have you considered growing the vines upward along a trellis or other support system as opposed to spreading out across the ground?
Vertical gardening techniques allow you to be more efficient with your space. You can grow more plants and plant varieties you may have not previously thought possible. Or, if you already have a big garden, it can become even bigger.
The Benefits of Vertical Gardening
Who says gardens should always be grown in a horizontal space along with the soil? Vertical gardens can be more productive, easier to maintain, and more appealing to the eye.
While the complete list is much 'taller', here are some of the top benefits of vertical gardens:
1. Maximize Your Space
By growing upward, vertical gardens increase your growing space, so are especially ideal for small backyards or urban rooftops and small terraces.
2. Improve Accessibility
When your plants are off the ground, tomatoes and vegetables are easier to reach and harvest. Watering, pruning and applying fertilizer are much more convenient and reduces stress on your back as well.
3. Grow Healthier Plants
Your plants are healthier when they're lifted off the soil. Air circulates through the plant better, reducing issues with pests and disease. Plus, if a problem does arise, your plants are much easier to care for.
4. Produce More
Did you ever think you could grow vines such as cucumbers and your favorite squash? With a vertical garden, you can grow more plants and a larger variety in your current space. You'll also be able to produce a higher overall crop yield by keeping your fruits and vegetables off the ground. They'll be cleaner and further away from pests.
5 Ways to Grow a Vertical Garden Using Cattle Panels
So you're thinking a vertical garden could work for you. Now what?
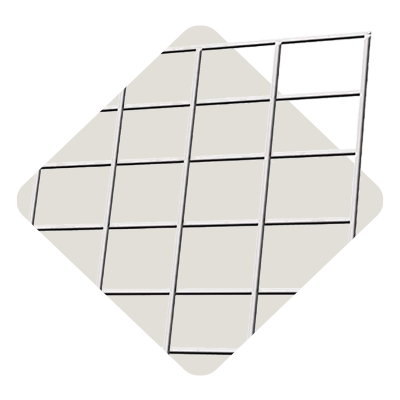
To grow your garden vertically, your plants will need a little support, and cattle panels are both a simple and affordable solution to keep your plants off the ground. Their heavy gauge and galvanized structure will hold up the heaviest plants and vines. Plus, the openings—measuring from 4 to 8 inches—are large enough to easily reach through to harvest your crops.
Cattle panels range between 8 and 16 feet wide and are usually 50 inches tall, allowing them to cover a large area and be used in a variety of ways in the garden.
Here are five ideas to help you grow a vertical garden using cattle panels:

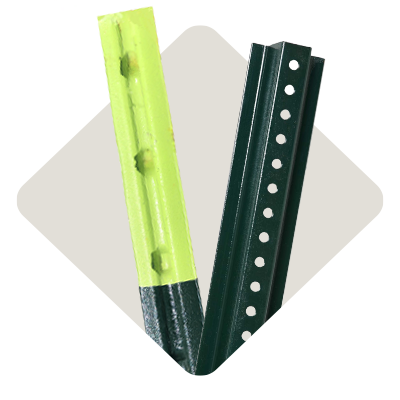
1. Vertical Trellis With T-Posts
One quick and easy way to use cattle panels is to stand up and support them with steel t-posts. Attach either 8' or 16' cattle panels to the t-posts with cable ties or metal wire. Drive your t-posts just short of the ends and overlap panels to a single t-post when you're using two or more side-by-side.
Plant your tomatoes, peppers, cucumbers, squash and more on one or both sides of the trellis. Make sure to place your trellis on the north or east side of your garden so it doesn't shade other smaller plants. As your plants grow, gently guide them through the trellis and tie them when needed.
If you have a medium-to-large size garden, this trellising method is mobile and can be moved from year to year. Simply, untie the panels and pull up the posts at the end of the gardening season. Build your trellis in a different spot the following spring to rotate your crops and help the soil.

2. Framed Vertical Garden Box Trellis
Do you want a more decorative trellis? Incorporate a cedar or redwood frame into your design. Set 4" wood posts a little over 8' apart and connect them with a 2"x2" frame (or another size you prefer). Attach an 8' cattle panel to the backside of the wood frame with either fence staples or screws.
A framed trellis may be used for both a raised garden box or a traditional garden bed. Depending on the garden type, either bolt the posts to the sides of a raised garden box or set them in the soil deep enough to support the weight of your plants. The tops of the posts should be at least 6 feet above soil level to leave 10-12 inches of space between the bottom of the wire and the ground. This will allow a tiller to still be able to rotate the soil under the trellis.
Grow tomatoes, pole beans, cucumbers or any other vertical plant or vine with this trellis. It's more permanent and should last several years.
Make sure to rotate your crops annually, and mix either compost or other amendments into your soil before each planting. Avoid stepping into your garden box and compacting the soil. If possible, stand on the outside and reach in to pick your vegetables.


3. Leaning Trellis and A-Frame Trellis
A leaning or a-frame trellis provides great support for vines such as cucumbers, beans, peas, squash and melons to grow. It also helps when it's time to harvest. While the green foliage winds up the trellis, most crops hang visibly below the structure.
Drive two steel t-posts a little less than the width of an 8' cattle panel (add one more directly in the middle for extra support if you're using a 16' panel). Lean the panel against the t-posts and attach it at the top with either cable ties or metal wire. To form an a-frame trellis and grow on both sides, lean two panels meeting at the top.
As an added bonus, plant lettuce and other leaf crops under the leaning panel or a-frame structure. When temperatures rise in late spring and summer, this will help provide a cooling shade, preventing the leaves from burning in the sun.


4. Arch Trellis
Create a trellis where your plants can thrive up and over the top, and you can stand under it to pick your favorite vegetables. Bend a 16' cattle panel lengthwise into an arch shape and secure it on each end with four 3' u-posts. Place the panel ends inside of the u-posts and attach them with cable ties or metal wire if needed.
Whether you build an arch trellis in a traditional garden bed or between two raised garden boxes, you'll have the advantage of growing your plants on the structure and using the space underneath. Create a walking path, a nice sitting area, or simply, more garden.


5. Berry Trellis
Raspberries and blackberries are both sweet, summertime favorites. If you love berries and plan to grow some in your yard, a trellis will help provide support along with better control over the plant's size, health and productivity.
A berry trellis with cattle panels is stronger than ones using securing wires such as a t-trellis. The t-trellis structure is a good starting point though when planning to build a berry trellis with cattle panels. Set two 4" posts 30"-36" below the soil and 4-5 feet above. Add two intersecting beams at different heights on each post, and support boards post-to-post. Cut two 3-5 panel rows (18"-30" in width) from an 8' cattle panel with manual bolt cutters. Mount each section of the panel along the top of the support boards between posts.
Once done and the bushes are planted in rows, your new berries will grow upright between the wires. Make sure to guide your plants through the panels and prune them when needed.


More Support in the Garden
Whether you're trying to be more productive with your space, wanting a different solution or simply prefer the aesthetics, fencing materials can help in a variety of other ways in your garden as well.
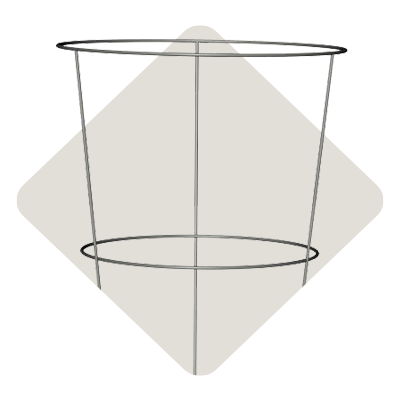
Tomato Cages
When growing in a cage, plants are supported by the sides and require less tying.
Traditional tomato cages – usually between 30-42 inches tall and rings 12-14 inches in diameter – are sufficient in many cases, but they can be too small and flimsy when you're trying to contain larger tomato plants such as heirlooms and beefsteaks.
 How to build two stronger alternatives to tomato cages
-
-
Bend an 8' wire cattle panel in 4 equal parts forming a square. Secure the ends together with either wire or cable ties in 3 to 4 spots. The resulting cage is 24" on each side and it supports taller plants better with its 50" height.
-
Rolls of Field Fence offer a good solution for large or community gardens. The fence openings are large enough to easily reach in and pull out your tomatoes, and a single roll is 330 feet in length; enough for approximately thirty-four 36-inch (in diameter) tomato cages.
-
Potato Towers
While potato towers are not a new invention, they've become more popular in recent years. Traditionally, they're built with tall wood boxes or a stack of tires forcing the plants to grow upward over the height of the tower.

In theory, there's a larger root system forming more tubers. However, there's also less area for leaf growth. The leaves channel energy into the tubers forming potatoes. Fewer leaves mean less energy is being stored, and your potatoes will end up being pretty small in size.
To create more above-ground space for plant growth, build your potato towers with Welded Wire Utility Fabric. One 36" tall, 50' roll can make up to five 38-inch (in diameter) round towers; each holding 9 sets of potatoes. The openings on the utility fabric are small enough to contain soil and straw, but large enough for the plants to grow outside of the tower walls. With leaves forming on the sides of the tower – as well as on top – there are more solar panels to stimulate tuber growth and there's a natural barrier around the tower to help keep it cool.

How to build a potato tower using Welded Wire Utility Fabric
Each set of potatoes will need 12" of soil to maximize its growing potential. With that in mind, build your potato tower using the following steps:
-
Cut a 50' roll of 36" Welded Wire Utility Fence into five 10' sections with wire cutters.
-
Roll each section into a cylinder and connect the ends by folding the ends of the wire back on itself, catching the other side.
-
Stand your wire tower upright, stabilize it with tent stakes or weed barrier staples, and begin filling it with soil and straw.
-
Line the inside of the wire wall with straw (enough to hold the soil) and fill the center with soil doing a few inches at a time. (Make sure to use rich soil, and add compost or other soil amendments before building your potato tower.)
-
When you reach 6" in height, place three potato sets an equal distance apart and 3-4 inches away from the edge. Point the eyes outward, fill the tower with 6 inches of straw and soil, and water.
-
Allow your first row to grow 10-14 days (or until the sprout is tall enough to direct out the side of the tower). Gently redirect the plant outward and fill your potato tower with 6 inches of straw and soil. Place three potato sets (similar to the first row), fill the tower with 6 more inches of straw and soil, and water.
-
Repeat Step 6 for the third row of potato sets. Make sure it's sturdy and filled to the top. When done, your tower should have three rows of three potato sets; one row each at 6", 18" and 30".
Remember, dry heat and windy conditions may hinder productivity. Potatoes produce the most tubers when the soil is cool and moist. If the soil gets too hot, your potatoes will stop making tubers. Regularly give them a good drink – not just a shower – and check the soil for moisture.
Also, consider adding a shade cloth near the southwest corner of each potato tower. The extra shade will help protect your plants from the hottest part of the day and may benefit overall productivity when it comes time to harvest.


Garden Enclosure
Do you want to separate your garden from pets or general foot traffic? Enclosing your garden within a wood and hog panel fence is both durable and pleasing to the eye. Simply place wood posts in the ground 8' apart and connect them with wire hog panels and a wood-framed border. Add a gate and your garden is safely enclosed.
Let Us Help
Hopefully, these tips are helpful and will spur an idea or two for your garden. If you have any questions, talk to the gardening professionals at your local IFA Country Store.

Have you incorporated cattle panels or other fencing into your garden?
Please post a photo and tag us on Facebook, Instagram and X with #IFALiving. We love seeing what you've built!
Information for this article was provided by Kent Mickelsen, Utah Certified Nurseryman, IFA Country Store; and Dan Jensen, Fencing & Livestock Equipment Category Manager, IFA Country Store.