One of the keys to maintaining a healthy, productive bee colony is controlling Varroa Mites, an annual parasitic nuisance. These little hitchhikers can cause damage and harm to your beehive if left unchecked.
What are Varroa Mites? How do you check for them? And how do you treat an infested bee colony? Learn how these parasites impact your hive and what you can do to control them.
What Are Varroa Mites?
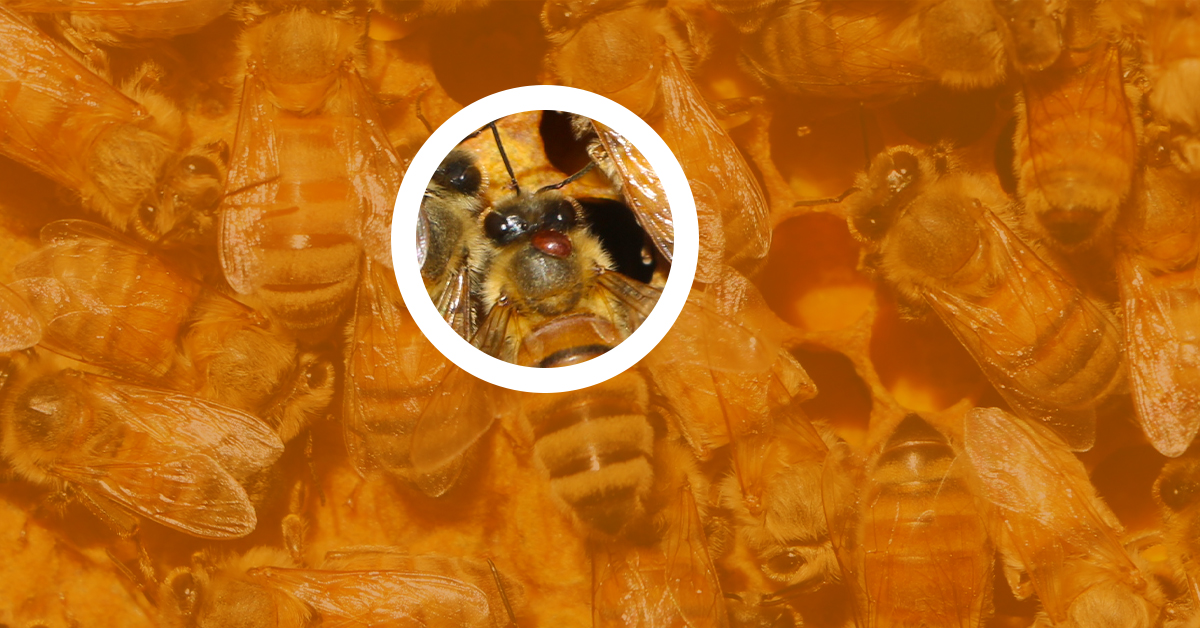
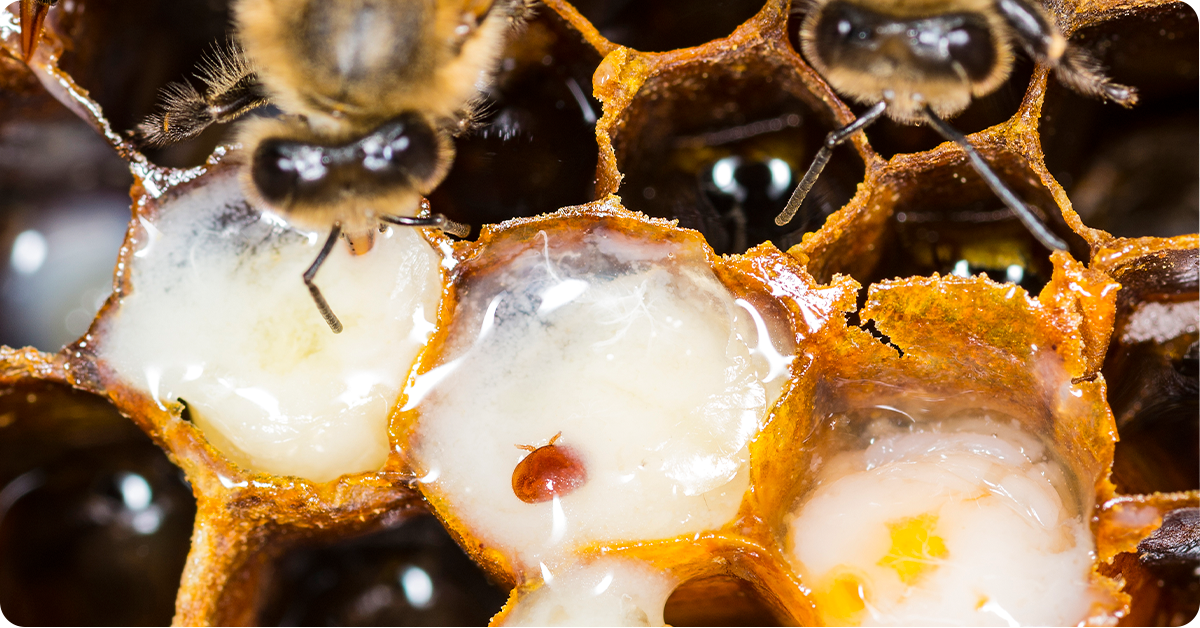
Varroa Mites are tiny, red-brown external parasites that suck the hemolymph (a blood-like substance) from honey bees. Mites weaken the immunity of bees and spread diseases that can lead to death and hive collapse.
Honey bees allow Varroa Mites free access to the hive throughout the summer, and drones are the largest carrier. As drones visit other hives, the mites will move from bee to bee and colony to colony.
Varroa Mites become a problem when the population jumps to dangerous levels, usually around August. Check mites several times a year and treat when populations increase to keep the mite population under control.

Regular Observation and Identification
The first step to controlling Varroa Mites in your beehive is regular observation and identification. Generally, a beekeeper should inspect the hive for Varroa Mites at least four times a year, beginning when the bee colony increases in population in the spring.
Effective mite control will reduce colony losses and prevent the spread of infectious disease. If you notice the bees hatching with deformed wings, it’s a mite problem. There are several ways to check for mites.
How to Check for Varroa Mites (3 Methods)
1. Alcohol Wash
An alcohol wash is the most effective method to quickly detect varroa mites. However, you will want to perform it away from the hive.
- Capture one-half cup of nurse worker bees in a jar (be careful not to include the queen) and place a disc of No. 8 mesh over the top.
- Next, pour rubbing alcohol over the bees and roll the jar for 60 seconds to ensure all bees are completely covered. As the mites die, they fall off the bee.
- Shake the jar like a salt shaker for 60 seconds and empty the alcohol and mites into a tub where the mites can be counted. Dispose of the dead bees.
2. Powdered Sugar Shake
If you want to avoid killing bees, substitute powdered sugar for the alcohol and after shaking off the mites, the bees can return to the hive. Do not perform the powdered sugar test in high humidity or during strong nectar flow because the dampness will cause the sugar and mites to adhere to the bees.
- Capture one-half cup of nurse worker bees in a jar (be careful not to include the queen).
- Add one heaping teaspoon of powdered sugar to the jar and place a disc of No. 8 mesh over the top.
- Spin and roll the bees around in the jar for one minute to completely cover them in sugar.
- Set the jar down and wait three to five minutes to allow time for mites to drop off.
- Shake the jar like a salt shaker and empty the sugar and mites into a tub until the mites stop falling out.
- Dissolve the sugar with a little water and count the mites. Return the sampled bees back to the hive.
3. Sticky Board
A sticky board is another method to test for mites. They sometimes naturally fall off bees to the bottom of the hive and can be counted to calculate a daily average drop. However, when counting you will also have to contend with other fallen hive debris as well.
- Take a Beetle Trap Tray and coat the top surface with cooking spray or petroleum jelly to make it sticky.
- Slide the tray in the slot at the back of the bottom board of the hive.
- Leave the tray for three days to allow time for mites to naturally fall off and stick to the board.
- After three days, remove the board and count the mites. Divide the total by three to calculate the average daily drop. If it's four or more mites, begin treating the colony.
How to Interpret Your Mite Test
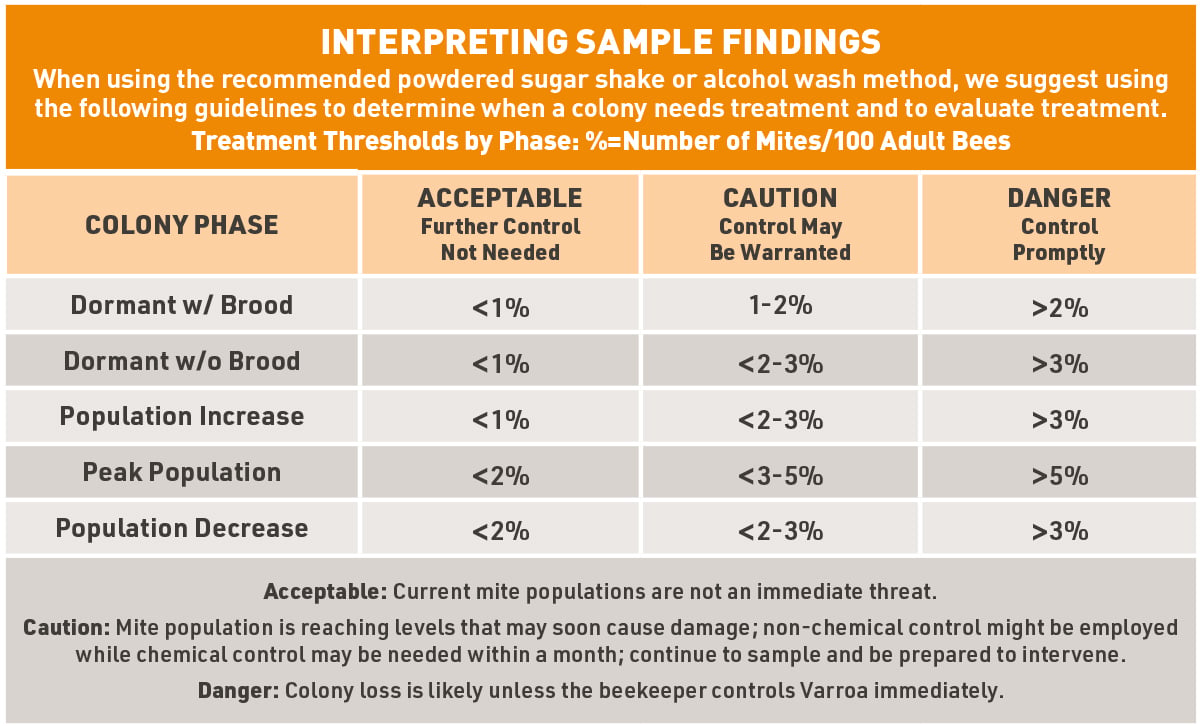
Based on a scale of 2–5% mites per 100 adult bees, if your mite levels are below 2%, that’s acceptable and no immediate control is necessary.
If the results show mite levels between 3–5%, further control efforts may or may not be needed. You can wait a week before taking another sample.
If mite levels are above 5%, you should apply mite control immediately.

How to Control Varroa Mites
Because mite populations can double once per month in colonies with brood, beekeepers should have an IMP (Integrated Pest Management) plan ready to regularly monitor and manage the mites.
 An IPM is a set of proactive, non-chemical and chemical methods that help beekeepers control Varroa Mites. This will ensure that your colony’s mite level remains 2-5%.
Mite-Away Quick Strips and Apivar Mite Strips are two common methods for treating mites. It’s important that you read the instructions and follow cautiously and carefully. Some treatments can be made while honey supers are on the hive but most cannot.
There is no one-size-fits-all solution for Varroa Mite management. Each beekeeper should select the control methods that are right for them. It may be worthwhile to experiment with various methods. In fact, we recommend not relying on one chemical or non-chemical control because it will hasten the development of resistance in mite populations.

Whichever control methods you select, we recommend repeat sampling after treatment to confirm your treatment was effective.
Be attentive and monitor your beehive closely. It’s a crucial aspect of beekeeping that will ensure you’ll receive a healthier bee colony and a better honey harvest.
Let Us Help
For more helpful advice and tools to keep your bees healthy and productive, visit your local IFA Country Store. We’re always happy to help.
Information for this article was provided by Matt Bangerter, Assistant Manager, Logan IFA Country Store; and Leonard Hulet, Lawn & Garden, Turf & Ornamental Dept. Manager, St. George IFA Country Store.


